Rack diagrams are used to outline how to assemble the physical rack diagram. This step can save you money, by reducing errors and unnecessary equipment purchases. Here is a 6-step guide on how to successfully create rack diagrams.
1. Choose a network diagramming software
Before you get started you'll need a network diagramming software. This will speed up the design process while giving your project a refined and professional look and feel.
There are many network diagramming softwares out there BUT not all of them offer the same features and results. Look for a solution that offers both topology and rack diagramming options, along with a syncing option to reduce errors between diagrams.
If you design networks, investing in a proper networking diagramming software is worth every cent.
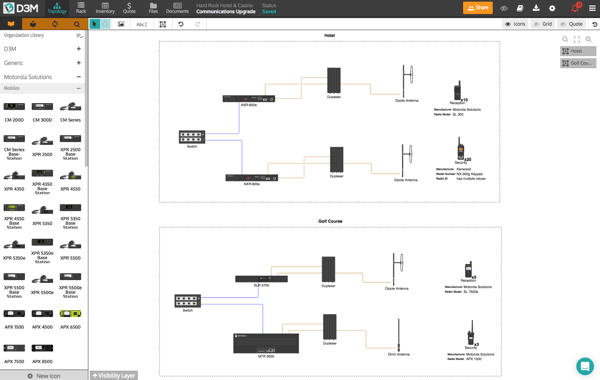
2. Design the network
Once you have a network diagramming software you can begin designing your network. I would suggest beginning with the topology view so you can account for all physical and non-physical items. Even though you are putting together a rack diagram you want to ensure the network as a whole will function successfully.
From here, you will have a sound starting point for building your rack diagram.
3. Identify physical items
Now that you've put together your network diagram it is time to identify the physical items. This includes all the equipment to be placed on the rack, along with the number of racks you'll need.
When deciding on the number of racks needed make sure to take into account any rack space that may be available for use. Many companies have an existing rack that is only partially being used, so why not capitalize on that?
Also, ensure you know the size of your rack and equipment to ensure the digital rack diagram you create can actually be executed on-site.
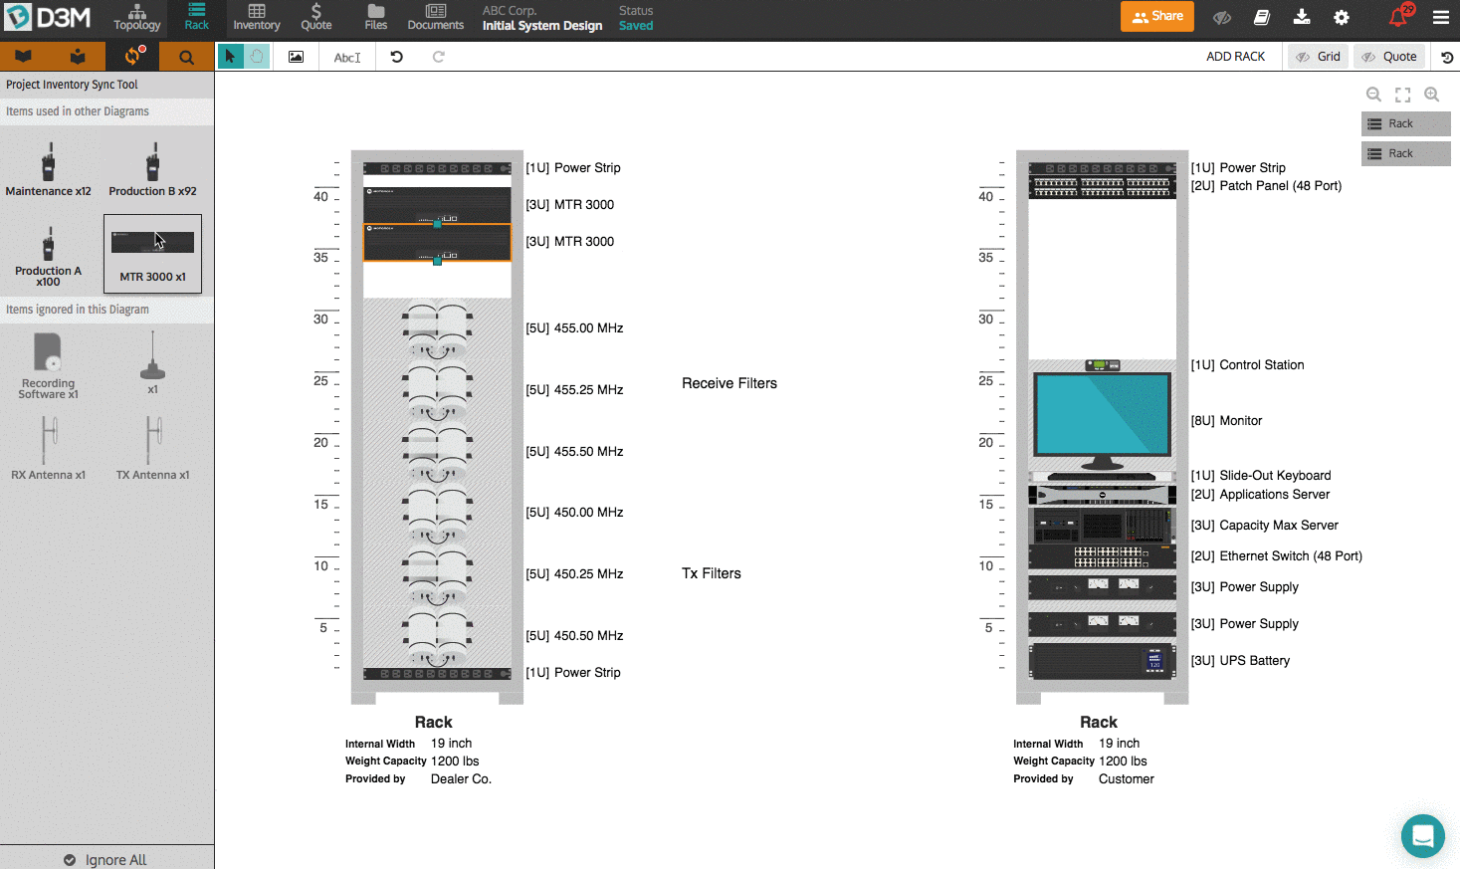
4. Place physical items onto the rack
After identifying the physical items you are now ready to place them on the rack. The purpose of a rack diagram is to organize exactly where each item will be placed on the rack on-site.
Simply drag and drop the appropriate icons onto to the rack in the order you find most logical until all physical items have been accounted for. A well-composed rack diagram can be the difference between a seamless installation process and a mess.
5. Label the diagram
To make sure the installation process is as smooth as possible label your rack diagram. This can include part numbers, names, etc. Don't have people guessing which piece of equipment you are referring to, take the time to properly label your diagram (the installer will thank you). This will help minimize confusion while streamlining the process.
From here, you can complete a final review and you're ready to go.
6. Complete a final review
Once you're finished your rack diagram, go back and take a final look at it to make sure it is logically sound. Double-check your topology diagram, the rack diagram, the equipment and the labels. Just like you would proofread a written document, you want to proofread your diagram, it could save you major headaches (and cash).
Hint: Have a colleague look over your rack diagram as a final catch-all for any errors or discrepancies (it never hurts to have a second set of eyes).
Now that you've completed your rack diagram you can use it to assemble the psychical rack diagram. This will speed up the installation process with no one needing to take the time to guess where items go or how they fit within the rack. Confidently create racks diagrams by choosing a network diagramming software, designing the network, identifying physical items, placing physical items on the rack, labeling the rack and completing a final review. Now let's get diagramming!