Rack diagrams allow you to document the physical layout of devices on a rack, avoiding costly mistakes and better equipping your techs during the install process. Here are 6 easy steps on how to create rack diagrams.
1. Choose a network diagramming software
Before you get started you'll need a network diagramming software. Sure, pen and paper works, but who wants to present that to a customer? A network diagramming tool will give your project a professional look and feel, along with the ability to easily make changes and adjustments along the way.
If you currently do not have a network diagramming solution I would suggest looking for one with a free option so you can try it out first before spending the money on it. Also since you are creating a rack diagram, the tool will need to have the capability to manipulate and display racks and devices.
2. Design the network (optional)
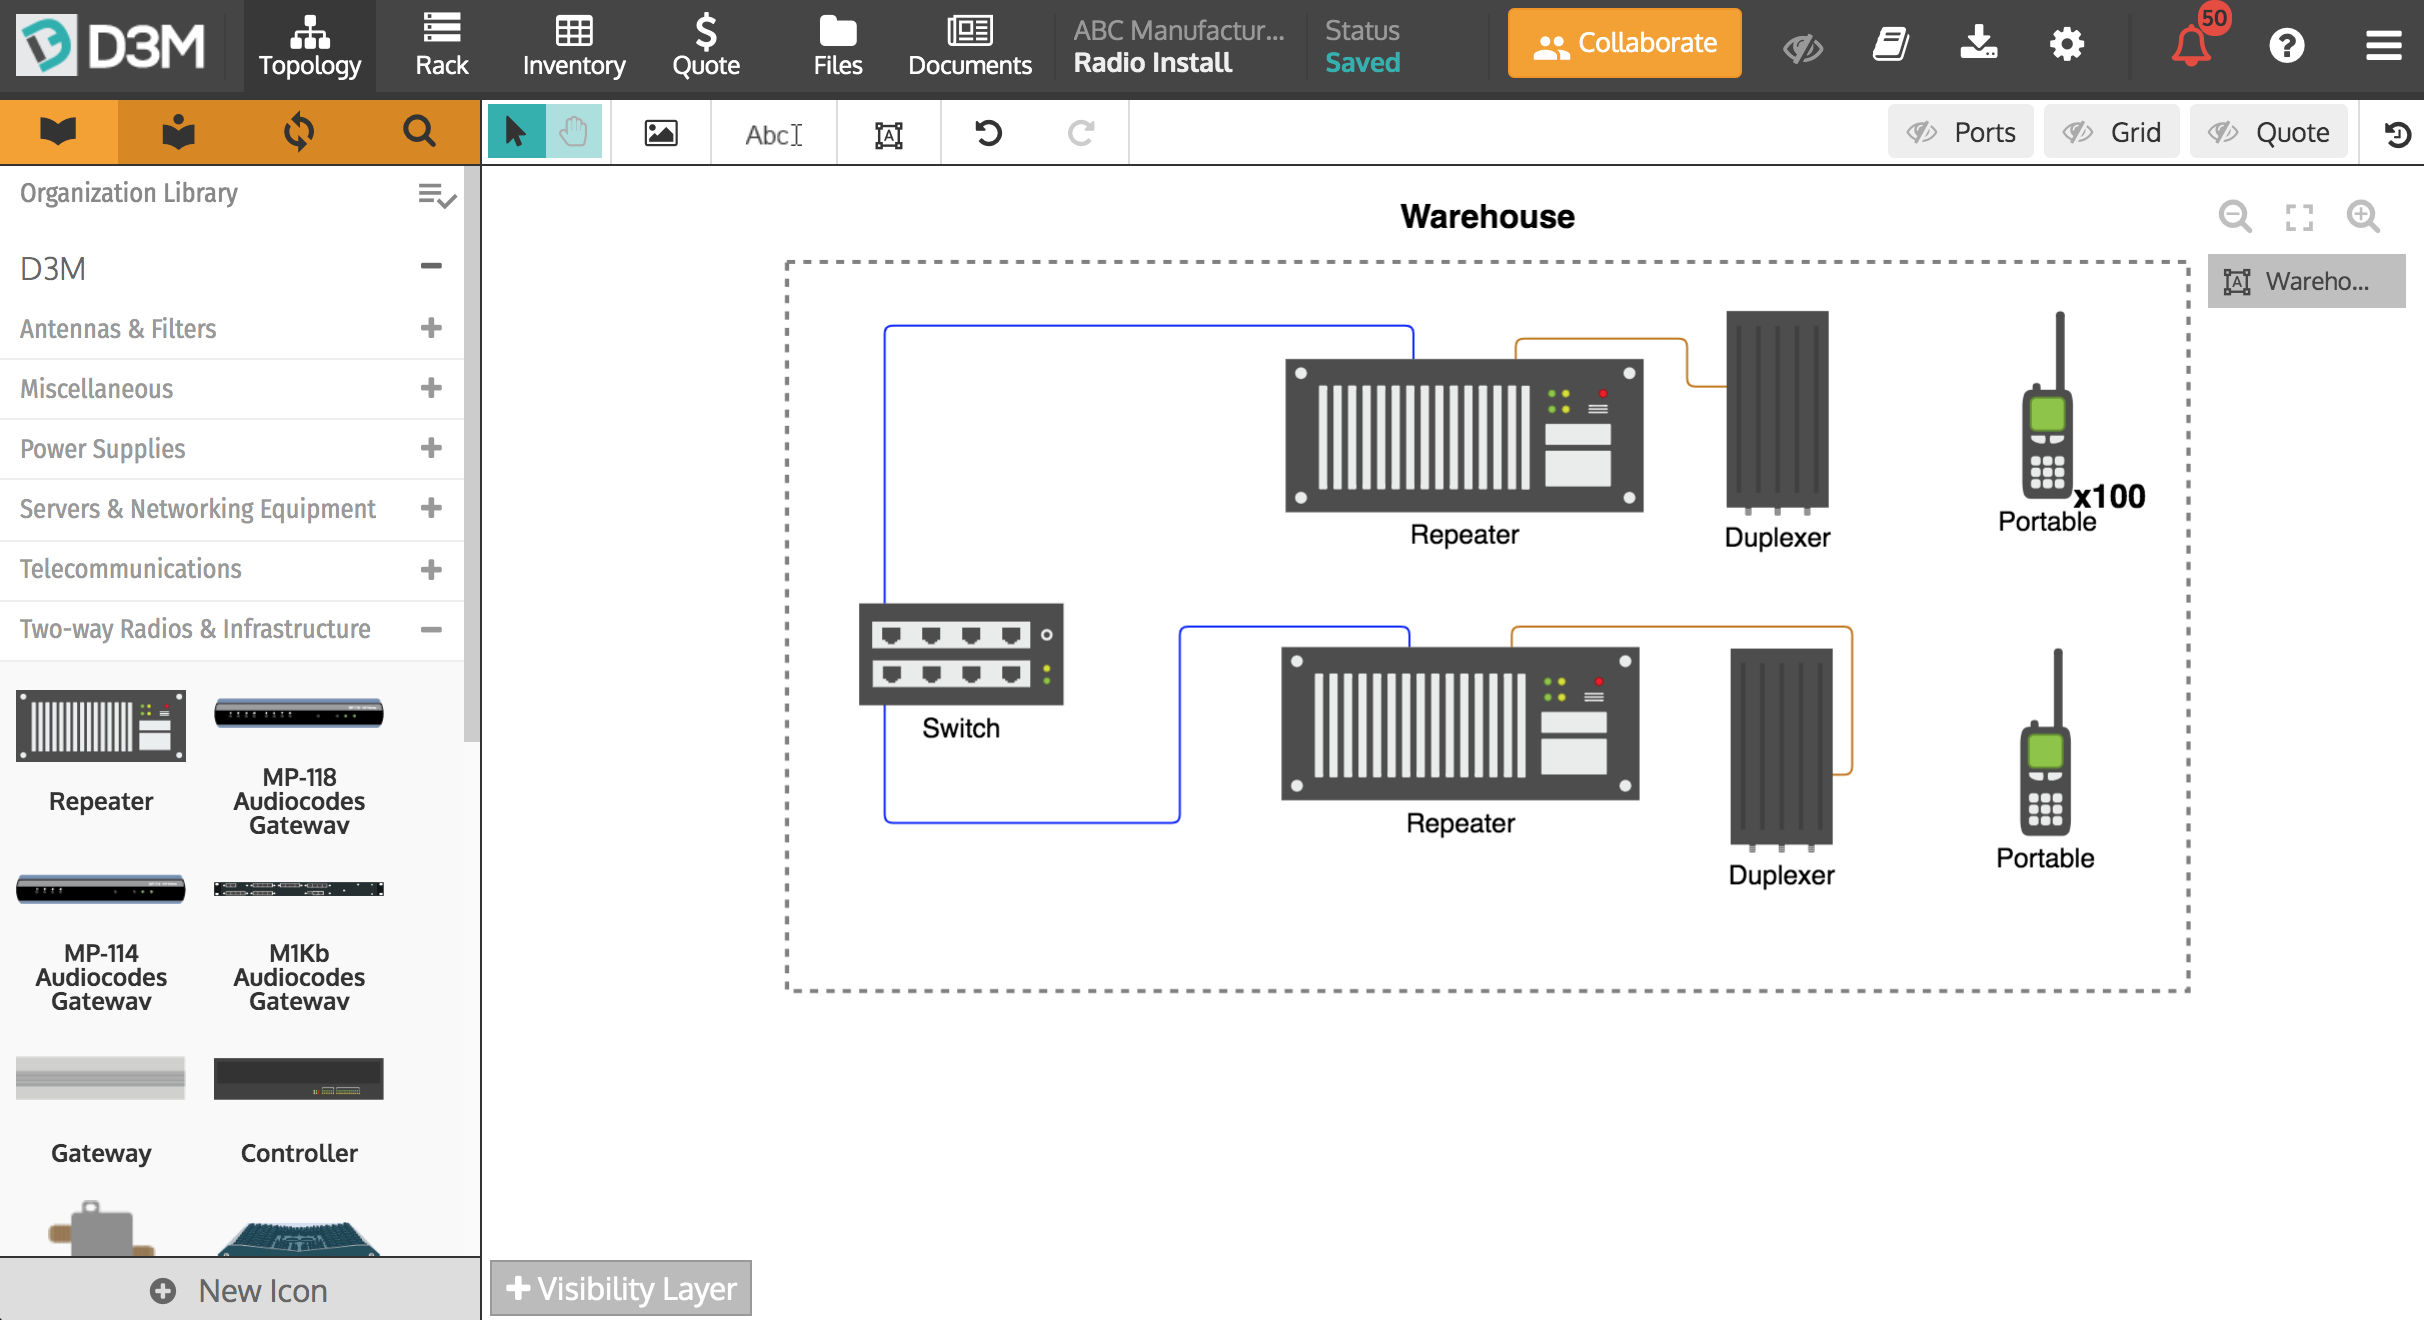
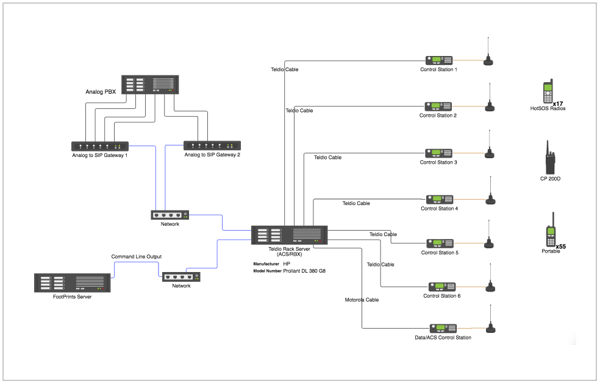
To create a rack diagram you can begin right in the rack diagram itself OR you can begin by building the topology diagram. Some people prefer to begin in the topology view so you can account for all physical and non-physical items (including physical items which will not be placed on the rack). This step allows you to ensure the network will function successfully.
3. Identify rack devices
Whether or not you begin by building the topology diagram or not, the next step is to identify the rack devices. This includes all the equipment to be placed on the rack, along with the number of racks you'll need.
When deciding on the number of racks needed make sure to take into account any available rack space. A company may have an existing rack that is only partially used, which you could use as well. Also, make sure you know the size of the rack and equipment to ensure the rack diagram you create can be properly executed on-site.
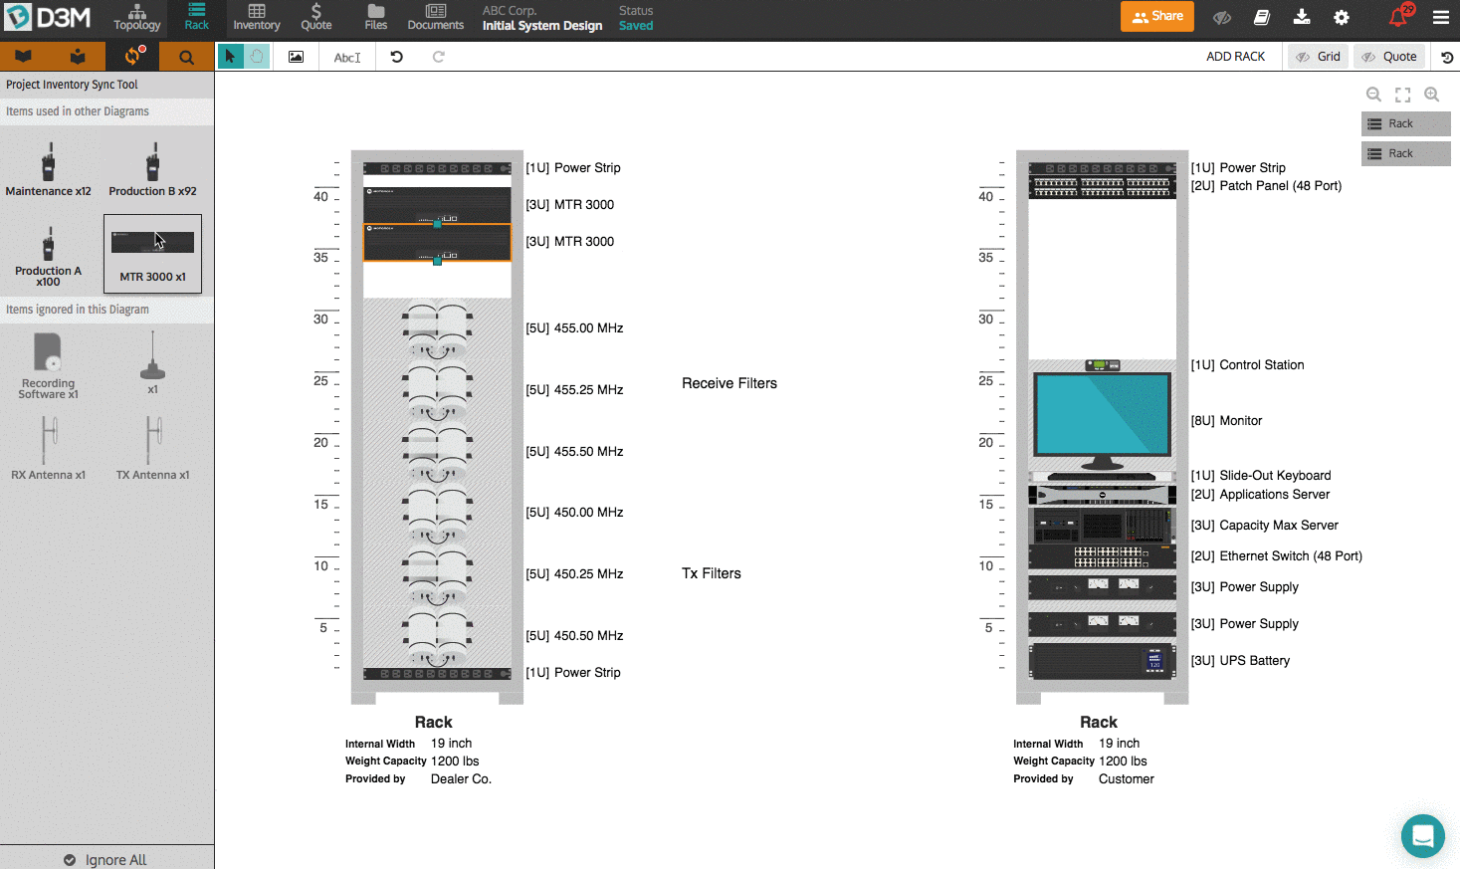
4. Place devices onto the rack
Now it is time to place the devices onto the rack diagram. Simply drag and drop the devices onto to the rack placing them where you want them to sit. The purpose of a rack diagram is to organize exactly where each item will be placed on the rack on-site.
5. Label the diagram
Once your rack diagram is assembled you'll want to label the diagram to help ensure a smooth installation process. This can include properties such as manufacturer, model, IP, serial number, etc. With proper labels, the installer will know exactly which piece of equipment you are referring to.
6. Complete a review
When you've completed your diagram, go back and take a final look at it to make sure everything is accounted for. Double-check your topology diagram, rack diagram, the equipment, and the labels. A final review can help you catch any mistakes or missing items which could save you major headaches and cash.
Hint: Have a colleague look over your rack diagram as a catch-all for any errors or discrepancies, four eyes are better than two.
Once your rack diagram is complete it can be used to assemble the psychical rack diagram, decreasing installation time and increasing accurateness. Now you can confidently create racks diagrams by following these 6 easy steps; choosing a network diagramming software, designing the network, identifying rack devices, placing devices on the rack, labeling the rack and completing a review.